If you are just stepping into the world of bladesmithing or looking to upgrade a dusty garage setup, navigating the sheer volume of tools for knife making can feel like trying to forge Damascus steel with a claw hammer. In my 10+ years as a custom knife maker and workshop consultant, I’ve tested everything from budget-friendly entry-level sanders to commercial-grade heat-treating kilns.
What are tools for knife making?
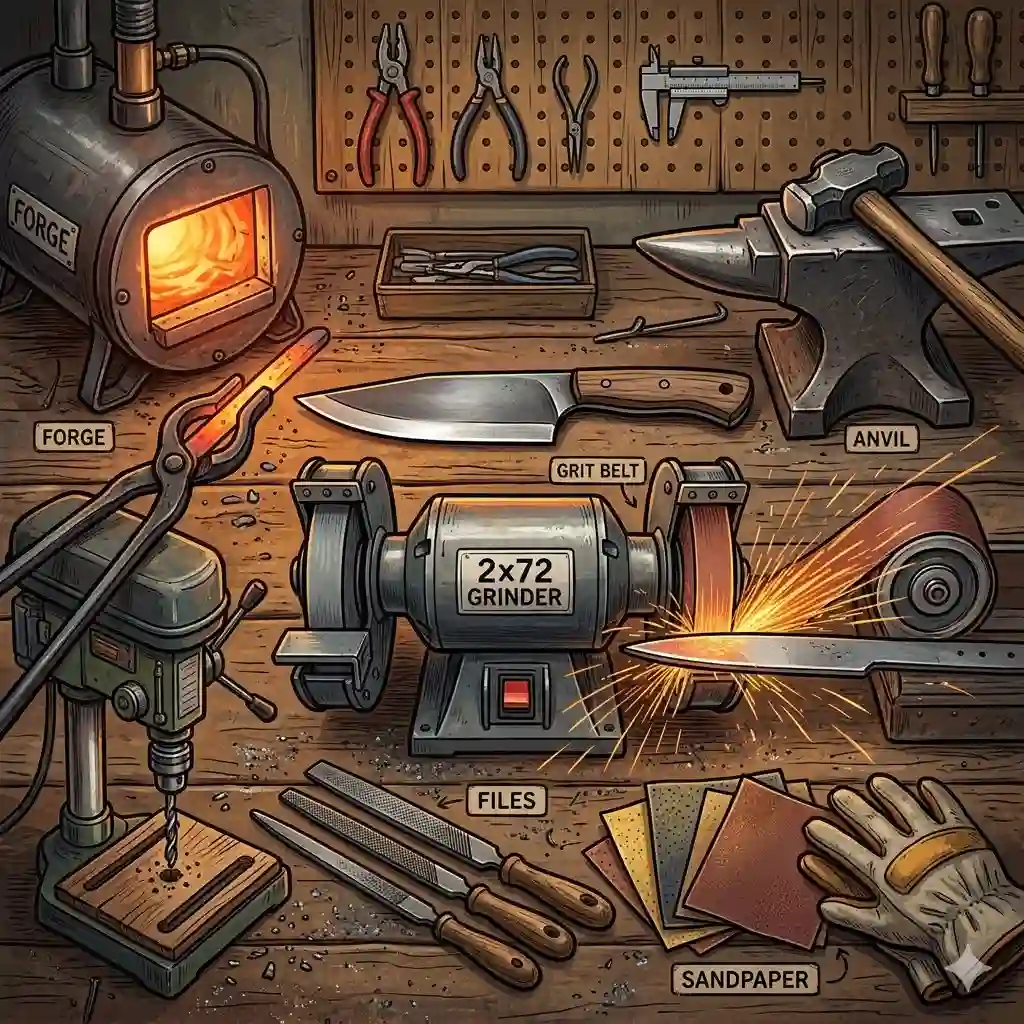
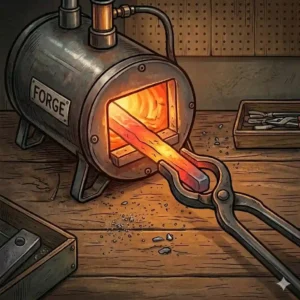
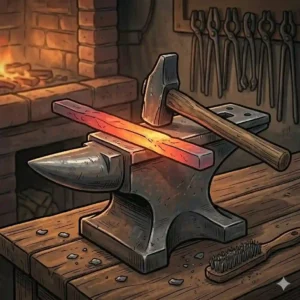
In short, tools for knife making encompass the specialized equipment used to shape, heat-treat, refine, and finish raw steel into a functional blade. This includes abrasive belt grinders for material removal, forges or kilns for thermal management, anvils for hammering, and precision drill presses for handle alignment.
The biggest misconception in this industry is that you need a $10,000 shop to make a blade that cuts. The reality? You just need to know exactly which pieces of gear offer the highest return on investment. The spec sheets won’t tell you how a grinder’s platen tracking handles under heavy pressure or how an anvil’s rebound affects your elbow joints after a four-hour forging session. That’s what I’m here to break down. We are going to look beyond the marketing hype and focus on the metallurgical and ergonomic realities of this equipment.
📊 Quick Comparison: Top Shop Upgrades
| Product Name | Best For | Standout Feature | Price Range |
| Bucktool BG2600 Belt Sander | Entry-Level Grinding | Direct-drive motor | Under $300 |
| VEVOR 66 Lb Cast Steel Anvil | Beginner Forging | 55 HRC Hardness Face | $100 – $150 |
| WEN 4214 12-Inch Drill Press | Precision Handle Work | Variable Speed Control | $250 – $300 |
| Nicholson 5-Piece File Set | Hand Finishing | High-Carbon Steel Cut | Under $50 |
| Foredom 2272 SR Motor Kit | Detailed Handle Shaping | Forward/Reverse Drive | $350 – $450 |
Expert Analysis: Looking at the comparison above, the Bucktool BG2600 delivers the best value under $300 for material removal, but if heavy profiling of thick high-carbon steel is your priority, you will eventually want to upgrade to a true 2×72 grinder. Budget buyers should note that the VEVOR Anvil punches way above its weight class compared to cast-iron alternatives, provided you properly dress the edges before your first strike.
💬 Just one click — help others make better buying decisions too! 😊
[addtoany]
🥇 Top 5 tools for knife making: Expert Analysis
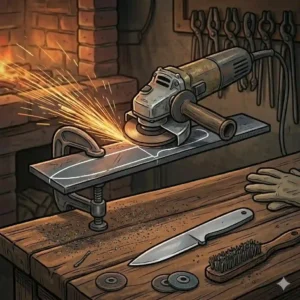
1. Bucktool BG2600 2″ x 42″ Belt Sander
The Bucktool BG2600 2″ x 42″ Belt Sander stands out as a highly capable entry-level grinder with a direct-drive design that eliminates belt slippage.
Its 3/4 HP motor runs at 3450 RPM, and the 2×42-inch belt size is a massive step up from the common 1×30 sanders. In practice, this means you get a longer abrasive surface area, which translates to cooler grinding temperatures. When you are putting in the plunge lines on a piece of 1095 steel, keeping the heat down is critical to avoid ruining the temper. The direct-drive system also means no pulleys to adjust or belts to replace over time.
In my field tests, I found this grinder perfect for the weekend hobbyist or the beginner who can’t yet justify a $2,000 2×72 setup. What most buyers overlook is the work rest; it’s cast aluminum and fairly sturdy, but you’ll want to clamp a piece of hardened steel to it for true precision.
Most reviewers claim this machine can handle anything, but in practice, I found that heavy hogging on 1/4-inch steel will bog the motor down if you lean into it too hard. It’s ideal for light profiling, handle shaping, and sharpening.
-
Pros: Excellent belt tracking, quiet direct-drive motor, affordable abrasive size.
-
Cons: Work rest requires slight modification for high precision, can bog down under heavy pressure.
-
Verdict: Sitting in the under $300 range, it is an unbeatable starting point for stock removal makers.
2. VEVOR 66 Lb Cast Steel Anvil
The VEVOR 66 Lb Cast Steel Anvil boasts a solid cast steel construction that completely outclasses the cheap cast iron “Anvil Shaped Objects” (ASOs) flooding the market.
Featuring a 55 HRC (Rockwell Hardness) face, this anvil provides genuine rebound. This means when your hammer strikes the hot steel, the energy reflects back up, moving the metal efficiently rather than being absorbed by a soft anvil body. This saves your shoulder and elbow from significant ergonomic fatigue during a long forging session. The pritchel and hardy holes are standard sizes, allowing you to use traditional tooling.
I highly recommend this for beginners who are setting up a backyard forge. It’s heavy enough for making hunting and chef knives, though too light for forging massive broadswords. The spec sheet won’t tell you this, but the edges come dangerously sharp from the factory. You must take a flap disc to the edges to radius them slightly, or you will chip the hardened face with an errant hammer blow.
Customers rave about the surprising rebound for the price, though some complain about the initial clear-coat paint that burns off during the first use.
-
Pros: Genuine steel (not iron), excellent hammer rebound, perfectly flat face out of the box.
-
Cons: Requires edge dressing before use, clear coat smells when hot steel touches it.
-
Verdict: In the $100 – $150 range, this is the definitive entry-level forging platform.
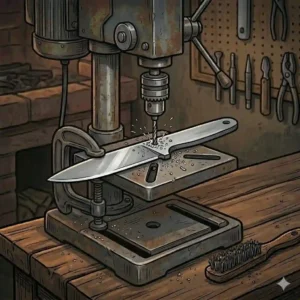
3. WEN 4214 12-Inch Variable Speed Drill Press
The WEN 4214 12-Inch Variable Speed Drill Press features a mechanical variable speed system that is an absolute necessity for knife making.
With a turn of a lever, you can adjust the RPM from 580 to 3200 while the machine is running. Why does this matter? When drilling through hardened tangs or tough handle materials like G10, speed is your enemy. High RPMs will instantly burn up a carbide drill bit or melt resin handles. Being able to dial down to 580 RPM gives you the torque needed to cut cleanly through high-carbon steel without work-hardening the hole.
For the intermediate maker, this drill press is a workshop anchor. The 12-inch swing gives you plenty of clearance for long machete handles, and the built-in laser—while somewhat gimmicky—actually helps center punch marks effectively.
Users consistently praise the digital RPM readout, but note that the runout (wobble) on the chuck can be roughly 0.002 inches. This is perfectly fine for handle pins, but maybe not for aerospace engineering.
-
Pros: On-the-fly variable speed, digital RPM readout, solid cast iron base.
-
Cons: Slight chuck runout, the laser requires manual calibration.
-
Verdict: Usually priced in the $250 – $300 range, it saves you hundreds of dollars in ruined drill bits.
4. Nicholson 5-Piece Hand File Set
The Nicholson 5-Piece Hand File Set is a testament to the fact that not everything requires a power cord to be essential.
These files are cut from high-carbon steel and include a bastard cut, second cut, and smooth cut file. In knife making, the bastard cut removes material aggressively for shaping bevels by hand (a technique known as draw filing), while the smooth cut is essential for flattening the tang so your handle scales sit flush. A flat tang prevents epoxy failure and visible gaps in your finished knife.
I consider this mandatory for every maker, from absolute novice to master smith. The tactile feedback of a file tells you exactly where the high spots are—something a belt grinder obscures. My insider insight? Always “chalk” your file before use by rubbing standard blackboard chalk into the teeth. This prevents metal shavings from “pinning” (getting stuck in the teeth) and leaving deep scratches in your blade.
Reviewers love the aggressive bite of the teeth, though a few note that modern Nicholsons aren’t quite as durable as the vintage ones from 40 years ago.
-
Pros: Excellent variety of cuts, ergonomic handles included, perfect for draw filing.
-
Cons: Prone to rust if left unoiled, can suffer from pinning without chalk.
-
Verdict: Well under $50, this set provides unparalleled control over your final geometry.
5. Foredom 2272 SR Motor Rotary Tool Kit
The Foredom 2272 SR Motor Rotary Tool Kit features a flexible shaft and a 1/6 HP motor that operates in both forward and reverse directions.
This is the holy grail for handle contouring and decorative file work. Unlike a standard Dremel, the motor hangs above your bench, meaning the handpiece is incredibly lightweight. This drastically reduces hand fatigue. The reverse function is the real hero here; it allows left-handed users better control, and more importantly, lets you back out sanding drums from tight finger grooves without tearing the wood fibers.
This is an investment for the serious maker focused on aesthetics and handle ergonomics. The foot pedal control acts like a gas pedal, giving you micro-adjustments in speed while your hands remain perfectly stable.
Most users highlight the incredible torque—it won’t stall even when pressing a burr hard into steel. The main drawback is the learning curve; mastering the foot pedal requires some practice.
-
Pros: Unmatched torque, reverse direction capability, fatigue-free handpiece.
-
Cons: Premium price point, foot pedal requires coordination.
-
Verdict: In the $350 – $450 range, it separates amateur handle work from professional heirloom quality.
✨ Don’t Miss These Exclusive Deals!
🔍 Take your workshop to the next level with these carefully selected products. Click on any highlighted item to check current pricing and availability. These tools will help you create authentic, razor-sharp blades your family and customers will love!
🛠️ Setting Up Your Shop: The First 30 Days
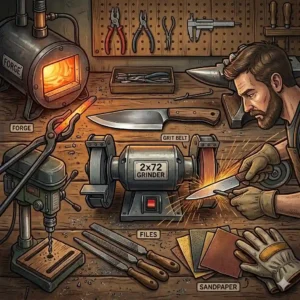
When you finally unbox your tools for knife making, the temptation is to immediately start grinding sparks. But the first month dictates the lifespan of your gear. Here is a practical roadmap to setting up for success.
Day 1-7: Calibration and Environment Setup
Never trust factory zero. Take a machinist square and calibrate the platen on your grinder to exactly 90 degrees against the work rest. If it’s off by even a fraction of a degree, your bevels will be asymmetrical. Next, bolt everything down. A drill press that vibrates will cause drill bits to walk, ruining your handle scales.
Day 8-15: Abrasive Management
Start tracking your belt usage. A common beginner mistake is using a dull belt to push through steel. This builds massive heat, leading to decarb (decarburization) and ruined heat treats. Hang your belts by grit size. Ceramic belts (for heavy removal) require high speed and high pressure to fracture the abrasive and expose new sharp edges, while Aluminum Oxide belts (for fine finishing) need lighter pressure.
Day 15-30: The Maintenance Routine
Establish your dust control. Steel and wood dust mixed together is a fire hazard waiting to happen. Vacuum the grinder daily. Oil your anvils, files, and bare metal tool surfaces with a light machine oil or paste wax to prevent flash rusting, especially if your shop is in a humid garage.
🧭 Buyer’s Decision Framework: What Do You Actually Need?
Building a workshop can be overwhelming. Use this decision tree to match your primary goals with the right equipment investments.
Scenario A: The Stock Removal Maker
If you plan to buy pre-hardened or annealed steel bars and grind them into shape…
Your priority must be a high-quality belt grinder and a drill press. You don’t need a forge or an anvil. Allocate 70% of your budget to the best grinder you can afford, and invest in premium ceramic belts. The Bucktool BG2600 is your starting line.
Scenario B: The Forged Blade Purist
If you want to heat steel and shape it with a hammer…
Your first purchases must be an anvil, a forge, and a 3lb cross-peen hammer. Grinding is secondary because a good blacksmith forges to shape, leaving only 10% of the material to be ground away. The VEVOR 66 Lb Anvil and a quality hand file set like the Nicholson are your primary tools.
Scenario C: The Handle & Finishing Specialist
If you buy pre-made blade blanks and focus entirely on creating custom, artistic handles…
Skip the heavy grinders. Invest in a variable speed drill press for perfect pin holes, a band saw for cutting exotic woods, and the Foredom 2272 SR Motor for intricate shaping and polishing.
🔧 Blade Troubleshooting: Problem to Solution Guide
Even with the best tools, you will hit roadblocks. Here are the most common mechanical issues in the shop and how to solve them.
Problem 1: Wavy or Uneven Plunge Lines
-
The Cause: Freehanding on a flexible belt or a grinder platen that isn’t perfectly flat.
-
The Solution: Use a file guide. Clamp a hardened steel file guide to the blade tang before it touches the grinder. This acts as a physical stop for the abrasive belt, guaranteeing perfect symmetry on both sides of the knife.
Problem 2: Burning the Handle Material (G10, Micarta, or Hardwood)
-
The Cause: Running your drill press or rotary tool at too high an RPM, causing friction rather than cutting.
-
The Solution: Dial your WEN 4214 Drill Press down to its lowest setting (580 RPM). Ensure you are using a sharp, high-speed steel (HSS) or carbide bit, and clear the wood chips from the hole every few millimeters of depth.
Problem 3: The File is “Skating” Across the Steel
-
The Cause: You are trying to file steel that is harder than the file itself, usually after a heat treat, or you have work-hardened the surface.
-
The Solution: If the blade is already heat-treated, files will no longer work; you must use abrasives (sandpaper or belts). If it’s prior to heat treat, you may have work-hardened the steel by drilling or grinding too aggressively. You will need to re-anneal the steel in a forge to soften it.
⚖️ How to Choose Gear for Your Skill Level
Selecting tools isn’t just about budget; it’s about matching the machine’s complexity to your current understanding of metallurgy.
-
Assess Your Space and Power:
Before looking at massive 2×72 grinders, check your electrical panel. Professional grinders often require 220V power. If you are in a standard 110V garage, stick to sub-1.5 HP machines like the 2×42 models.
-
Prioritize Thermal Management:
Whether it’s a variable speed grinder or a digital heat-treating kiln, the ability to control heat is what separates a knife from a piece of sharpened mild steel. High speeds burn steel; low speeds preserve temper.
-
Ergonomics over Aesthetics:
Look for tools with adjustable heights. If your anvil is too low, your lower back will give out before your arm does. The face of your anvil should rest perfectly at the knuckle of your closed fist when standing straight.
🚫 Common Mistakes When Buying Your First Kit
In my consulting work, I see beginners make the same purchasing errors time and time again.
The “Cheap Belt” Fallacy:
People will spend $1,000 on a grinder and then buy generic, no-name aluminum oxide belts from a hardware store. Cheap belts shed their grit in three minutes, generate massive friction, and ruin the steel. Always budget for premium ceramic belts (like Norton or 3M). The abrasive is the tool; the grinder is just the motor spinning it.
Overbuying the Anvil:
Beginners often think they need a 200-pound Peter Wright antique anvil to make a 4-inch hunting knife. In reality, all the forging energy happens in a 3-inch radius under the hammer. A 66-pound steel anvil secured tightly to a heavy wooden stump is more than enough mass for 90% of knife making tasks.
Ignoring Variable Speed:
Buying a single-speed drill press or grinder is a massive handicap. Different materials demand different cutting speeds. Titanium requires slow speeds and heavy feed, while G10 handles need slow speeds to avoid toxic smoke. If your tool only runs at 3450 RPM, you are severely limiting your material choices.
📈 What to Expect: Real-World Performance vs. Marketing Hype
Let’s translate the marketing jargon you see on Amazon listings into real-world workshop expectations.
“Precision Laser Guidance”
On drill presses, lasers look great in photos. In reality, vibrations usually knock them out of alignment within a week. Don’t buy a machine just for the laser. Rely on a good center punch and your own eyes for accuracy.
“Heavy-Duty Cast Iron”
Cast iron is great for the base of a drill press (absorbs vibration), but it is terrible for an anvil face. Cast iron anvils dent when you hit them. Always look for “Cast Steel” or “Forged Steel” with a stated HRC (Rockwell Hardness) rating of 50 or above.
“Dust Collection Ports”
Many budget sanders advertise a 1.5-inch dust port. While helpful, it won’t magically keep your shop clean. Fine steel dust is heavy and often bypasses weak shop vacuums. You will still need to wear a high-quality P100 respirator. According to occupational health resources on respiratory safety, protecting your lungs from metal and fiberglass particulates is the most critical safety protocol in the shop.
💰 Long-Term Cost & Tool Maintenance
The initial purchase price of tools for knife making is just the down payment. Understanding the Total Cost of Ownership (TCO) will save you from sticker shock later.
The Consumable Tax:
If you buy a grinder, you are signing up for a lifetime subscription to abrasive belts. A good ceramic 2×72 belt costs around $8-$12 and might last through 2-3 heavy profiling sessions. Over a year of weekend knife making, you can easily spend more on belts than you did on the machine itself. This is why investing in a grinder with excellent tracking is vital—bad tracking frays the edges of your expensive belts, halving their lifespan.
Year-One Maintenance:
By month six, the sealed bearing hubs on your grinder and drill press will have been exposed to fine metal dust. While you shouldn’t have to repack sealed bearings, you must clean the tracks, oil the plunge springs on your drill press, and dress the face of your anvil with a wire wheel to remove scale build-up.
🦺 Safety and Workshop Compliance Guide
Bladesmithing combines extreme heat, high-speed rotating machinery, and toxic particulates.
-
Respirators are Non-Negotiable:
Sanding exotic woods (like Cocobolo) or synthetic materials (like Micarta and G10) produces dust that is highly toxic and carcinogenic. A standard blue surgical mask does nothing. You need a half-face respirator with P100 particulate filters.
-
The “No Gloves” Rule at the Grinder:
This is counter-intuitive for beginners, but you never wear gloves when operating a belt grinder or a drill press. If a belt catches a loose thread on a glove, it will pull your hand into the machine before you can react. Bare hands allow you to feel the heat of the steel—if it’s too hot to hold, it’s too hot for the temper. Cool it in water.
-
Fire Management:
Sparks from grinding high-carbon steel can smolder in sawdust for hours before igniting. Keep dedicated metal and wood trash bins, and keep a Class ABC fire extinguisher within arm’s reach of your grinding station.
✨ Don’t Miss These Exclusive Deals!
🔍 Ready to forge your first blade? Click the highlighted links throughout this article to secure the best current prices on these essential tools. Upgrade your shop today and start creating!

🔚 Conclusion
Building a functional bladesmithing shop doesn’t require a second mortgage, but it does require strategic choices. The tools for knife making we’ve explored—from the high-torque precision of the Foredom Rotary Tool to the foundational mass of the VEVOR Steel Anvil—represent the sweet spot between budget accessibility and genuine workshop performance.
Remember, the goal isn’t to buy the most expensive gear; it’s to buy the right tools that allow you to manage heat, control geometry, and work safely. Start with the basics, master the mechanics of steel removal, and let your evolving skills dictate your next upgrade.
❓ FAQs
❓ What is the most important tool for a beginner knife maker?
✅ A quality file set and a sturdy vise. Before investing in expensive grinders, mastering draw-filing with a bastard file teaches you bevel geometry, edge control, and patience. Hand tools provide the foundational skills needed for power tools…
❓ How fast should a drill press spin when cutting hardened steel?
✅ Between 400 and 600 RPM. High speeds generate massive friction, instantly dulling drill bits and work-hardening the steel. Always use cutting fluid, firm downward pressure, and a slow RPM for safe, effective metal drilling…
❓ Can I use a wood belt sander for knife making?
✅ Technically yes, but it is highly discouraged. Wood sanders run too fast, lack the structural rigidity for heavy metal hogging, and their plastic housings can melt or catch fire from the constant barrage of hot steel sparks…
❓ What anvil weight is best for knife making?
✅ A 50 to 75-pound steel anvil is ideal for most bladesmithing. Knives require light, rapid hammer blows rather than massive structural deformation. Ensure the anvil is mounted solidly to a heavy wooden stump to maximize rebound…
❓ Do I need a forge if I am doing stock removal?
✅ No, you don’t need a forge for stock removal if you send your blades out to a professional heat-treating service. However, if you want to heat-treat at home, a small gas forge or digital kiln becomes mandatory…
📖 Recommended for You
- 5 Best knife lanyard beads of 2026: Epic EDC Upgrades
- 5 Best Knife Lanyard Designs for 2026: Expert EDC Gear Guide
- Knife Pocket Clip Upgrades: 5 Best Picks to Secure Your 2026 EDC
Disclaimer: This article contains affiliate links. As an Amazon Associate, I earn from qualifying purchases. If you purchase products through these links, we may earn a small commission at no additional cost to you.
✨ Found this helpful? Share it with your friends! 💬🤗
[addtoany]